

How to Integrate Lights Without Disrupting Your LEGO® Design
Introduction
Imagine a LEGO® cityscape that comes alive as dusk falls, with tiny streetlights casting a warm glow on the miniature avenues, or a LEGO® spaceship where the control panel lights up, hinting at the vastness of the universe it’s about to explore. This is the transformative effect of lighting on LEGO® designs – turning static models into vivid, dynamic creations.

However, integrating lights into LEGO® builds is not without its challenges. The primary concern for many builders is how to add this sparkle without altering the essence of their designs. After all, the beauty of a LEGO® creation lies in its faithful adherence to the envisioned design, whether it's a detailed architectural replica or a whimsical fantasy world.
Enter "bright bricks" - a term that symbolizes the perfect harmony of light and LEGO. These aren’t just ordinary lights; they are beacons that enhance, not overshadow, the creative vision behind every LEGO® build. They serve as a subtle yet powerful tool, adding depth, emotion, and a sense of realism to the designs. In this article, we will explore how to skillfully integrate these bright bricks into your LEGO® projects, ensuring that the lights elevate your design rather than disrupt it.
Section 2: Choosing the Right Lights
Subsection 2.1: Factors to Consider
Integrating lights into a LEGO® design requires thoughtful consideration of several key factors. The choice of lights can dramatically change the appearance and feel of your build. Here are the main aspects to consider:
- Color: The color of the lights plays a crucial role in setting the mood of your creation. Warm colors like yellow and orange can evoke a sense of coziness, ideal for domestic scenes or historical buildings. Cooler colors like blue and white, on the other hand, are perfect for futuristic models or to simulate natural light.
- Size: The scale of the lights in relation to your LEGO® build is critical. Small, pinpoint lights can be used to highlight details without overwhelming them, while larger lights are suitable for creating broader illumination, such as streetlights in a cityscape.
- Intensity: The brightness of your lights should complement, not overpower, your LEGO® design. Subtler, dimmer lights can create an air of mystery or evening ambiance, while brighter lights can simulate daylight or spotlight key features of your design.
-
Overall Impact: Consider how these elements - color, size, and intensity - work together to affect the overall look and feel of your build. The goal is to enhance your LEGO® design, not to distract from it.

Subsection 2.2: Recommended Types of Lights
When selecting 'bright bricks' for your LEGO® build, the type of light you choose is as important as its color, size, and intensity. Here are some recommended types:
-
LED Strips: These are versatile and can be cut to size, making them suitable for a variety of designs. They offer even lighting, perfect for larger builds.

-
Spotlights: Ideal for highlighting specific features of your design, spotlights can focus attention on the areas you want to showcase.

-
Fiber Optic Lights: Excellent for intricate details, fiber optics can be weaved into small spaces without altering the structure of your LEGO® build.

-
Color-Changing LEDs: These allow for dynamic lighting effects, changing the mood of your build with a remote control. They are great for interactive designs or models that depict different scenes.

- Miniature Bulb Lights: Perfect for smaller, detailed work, these can mimic the look of actual light fixtures in miniature builds.
By carefully considering these factors and types of lights, you can select 'bright bricks' that perfectly complement and enhance your LEGO® design, maintaining its integrity while adding an enchanting illumination.
Section 3: Integration Techniques
Subsection 3.1: Seamless Integration Strategies
Integrating lights into your LEGO® design should enhance, not detract from, your creation. Here’s how you can achieve a seamless integration:
- Start with a Plan
- Before you begin building, sketch out where the lights will go. This planning helps in achieving a balanced look and ensures that the lights serve the design, rather than the other way around.
- Incorporate Lights During the Build Process
- It’s easier to integrate lights as you build rather than adding them afterward. This approach allows you to hide wires and adjust the placement of lights as needed.
- Use the Right Tools
- Specialized LEGO® lighting kits come with tiny wires and battery packs that fit snugly within or behind the LEGO® bricks, ensuring minimal disruption to the design.
- Embrace Subtlety
- Sometimes, less is more. Use lights to accentuate rather than dominate. Subtle lighting can bring out the best in your LEGO® design without overwhelming it.
- Conceal Wiring
- Run wires through the gaps between bricks or underneath the baseplate. Keeping wires out of sight is crucial for maintaining the aesthetic integrity of your build.
- Match the Theme
- The style of lighting should match the theme of your build. For example, a medieval castle might benefit from warm, flickering lights to mimic torches, while a modern cityscape might require bright, white LEDs.

Subsection 3.2: Creative Placement of Lights
The placement of lights can dramatically affect the perception of your LEGO® build. Here are some innovative ideas for placing lights:
- Highlighting Focal Points
- Direct lights towards the main features of your build, like the windows of a building, the engines of a spaceship, or the headlights of a car.
- Creating Depth and Shadow
- Use lighting to create depth. Illuminate the background slightly less than the foreground to give a sense of depth, or use shadows to add dimension and drama.
- Mood Lighting
- Use colored lights to set the mood of a scene. For instance, use blue lights to create a night-time effect or red lights for a dramatic, intense scene.
- Interactive Elements
- Consider integrating lights that can be turned on and off by the viewer. This interactivity adds a playful element to your design.
- Layering Lights
- Combine different types of lights to create layers. For example, use a base layer of soft ambient light with brighter spotlights to highlight specific elements.
By employing these integration techniques and creative placement strategies, you can ensure that the lights enhance your LEGO® design, adding an extra dimension of realism and allure without disrupting the inherent beauty of the build.
Section 4: Managing Brightness and ColorSubsection
4.1: Controlling Brightness
The brightness of your lights can have a significant impact on the appearance and mood of your LEGO® design. Here’s how to adjust and control it effectively:
- Use Dimmable Lights
- Whenever possible, opt for lights that come with dimming capabilities. This feature allows you to adjust the intensity to suit the specific needs of your build.
- Experiment with Placement
- The angle and distance of light from your LEGO® creation can affect its brightness. Experiment with different placements to achieve the desired effect.
- Layering Different Light Sources
- Combine bright and dim lights to create a balanced illumination. For instance, use brighter lights for the interior of a build and softer, dimmer lights for the exterior.
- Consider the Environment
- The ambient light in the room where your LEGO® set is displayed can affect how bright your lights appear. Adjust the brightness of your lights to complement the surrounding lighting.
- Test and Adjust
- Periodically step back and view your build from a distance. Sometimes what looks right up close can be too bright or too dim when viewed as a whole.

Subsection 4.2: Color Schemes and Harmony
Choosing the right color for your lights is crucial in maintaining the thematic integrity of your LEGO® build. Here’s how to select colors that harmonize with your design:
- Understand Color Psychology
- Different colors evoke different emotions. For example, blue can create a calming effect, while red can add drama and intensity.
- Match the Theme
- The colors of your lights should complement the theme of your build. For a nature scene, greens and yellows might work best, while a space-themed build might benefit from cooler colors like blue and white.
- Use Complementary Colors
- Consult a color wheel to find complementary colors that enhance each other without clashing. This approach can add depth and visual interest to your design.
- Create Transitions
- If your build has different areas or scenes, use light colors to create smooth transitions between them, helping to tell a story or guide the viewer's eye.
- Test with Different Hues
- Don’t be afraid to experiment with various hues and intensities. Sometimes, a slight change in color can make a significant difference in the overall look of your LEGO® design.
By carefully managing the brightness and color of your lights, you can ensure that they enhance your LEGO® build, adding to its visual appeal and emotional impact, while maintaining the integrity of the original design.
Section 5: Real-World Examples
Subsection 5.1: Case Studies
To illustrate the principles we've discussed, let's look at some real-world examples where lights have been masterfully integrated into LEGO® designs:
- The Haunted House
- A LEGO® haunted house set comes to life with carefully placed flickering lights to mimic candles and lanterns. Subtle green and purple lights add a ghostly glow, creating an eerie atmosphere.
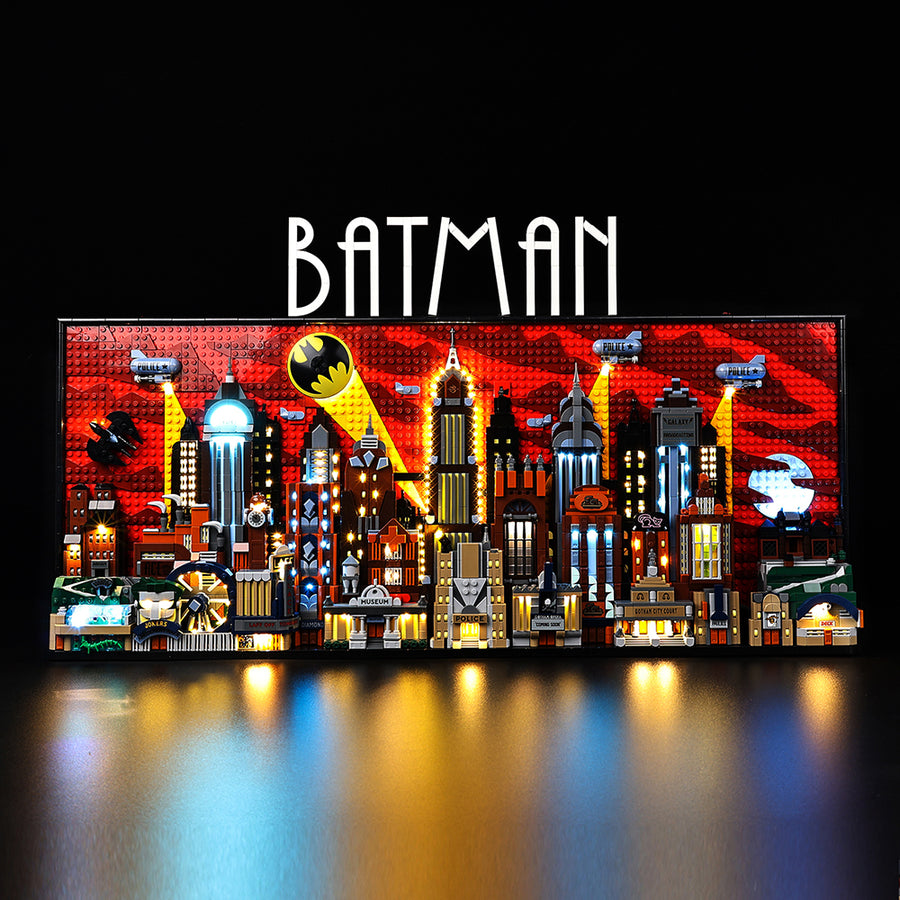
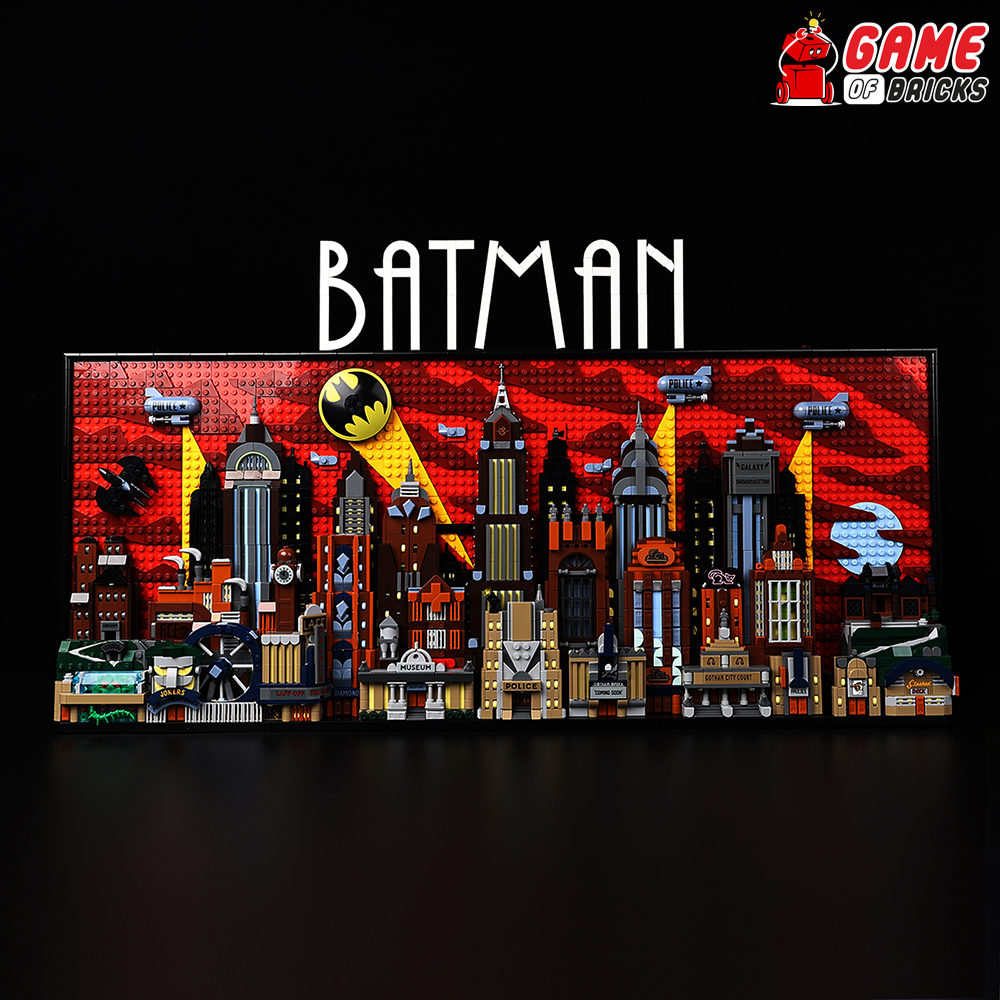
- The Downtown Cityscape
- In a LEGO® cityscape, streetlights and illuminated windows bring the city to life. Bright white LEDs are used for streetlights, while softer yellow lights fill the interiors of buildings, creating a realistic dusk scene.
- The Space Station
- A space-themed LEGO® set features a mix of bright white and blue LEDs to give a futuristic look. Strategic placement of lights in control panels and around the station emphasizes the high-tech nature of the build.

Subsection 5.2: Lessons Learned
From these examples, we can glean several valuable lessons:
- Context is Key
- The choice and placement of lights should always be in harmony with the theme of the build. The haunted house's flickering lights enhance its spooky theme, while the cityscape's streetlights bring an urban feel.
- Less Can Be More
- Subtlety can be powerful. The use of softer lighting in the interiors of the cityscape buildings creates a contrast with the brighter streetlights, adding depth and realism.
- Experimentation Leads to Perfection
- These examples likely didn’t start out perfect. Through trial and error, the builders would have found the ideal balance and placement of lights.
- Attention to Detail
- Small details, like the color choice for the space station, make a big difference. Such attention to detail can elevate a LEGO® build from good to great.
- Storytelling Through Lighting
- Effective lighting does more than just illuminate; it tells a story. The haunted house's ghostly glow tells a story of mystery, while the cityscape's lights depict the hustle and bustle of urban life.
These real-world examples demonstrate the transformative power of lighting in LEGO® designs. By learning from these case studies, builders can apply similar techniques and creativity to their own projects, using 'bright bricks' to bring their LEGO® creations to vibrant life.
Conclusion
In the world of LEGO® building, the addition of lights can transform a simple assembly of bricks into a captivating piece of art. Throughout this article, we've explored key strategies for integrating lights into LEGO® designs, emphasizing the importance of choosing the right lights, balancing brightness and color, and creatively placing lights to complement, not overpower, the essence of the design. These techniques are not just about illumination; they are about enhancing the narrative and emotional impact of your LEGO® creations.
As you embark on your next LEGO® project, I encourage you to experiment with 'bright bricks'. Remember, each light you integrate is a chance to add depth, drama, and a touch of magic to your builds. Whether you’re illuminating a cozy LEGO® cottage or a sprawling cityscape, the right lighting can elevate your creation from a collection of bricks to a story in miniature. So go ahead, play with light, and let your LEGO® designs shine in ways you never thought possible.
Call-to-Action (CTA)
Now that you're equipped with the know-how to illuminate your LEGO® creations, we'd love to see what you can achieve with 'bright bricks'. Share your light-integrated LEGO® designs with our community and inspire fellow builders! If you're looking to start this luminous journey, explore a wide range of LEGO® LED Light Kits at Game of Bricks. Whether you're a novice or a seasoned pro, these kits provide everything you need to bring your LEGO® sets to life. Let your creativity shine, and don't forget to share your glowing masterpieces with us!


Top
Leave a comment